 Mother of God Iakromskaya. Saint Andrew workshop.
|
In many icons garments are enhanced by fine golden rays that have the effect of increasing their radiance and of accentuating the glory of the person represented.
Assist gilding is a work of precision and the study of models is indispensable before beginning it. Here are some models that could help you with your sketches:
Vladimirskaya
Christ in Glory (Rublev)
Our Lady of the Passion (Greece)
|
The material
|
 |
The following materials are required to do a gold assist:
- A fine brush to apply the sizing.
- Sheets of gold leaf on a backing.
- Talcum powder to protect the painting.
- The soft part of black bread to press in the gold leaves.
- Wadding cotton to smooth the gold.
- Bleached shellac to protect the gold.
|
|
Preparation of the sizing
|
|
|
The Assist sizing can be prepared according to three main recipes:
- Garlic based sizing:
Take several cloves of garlic and press them to extract their juice. Filter this juice (through an old sheer stocking for example) and add some red ochre to make apparent the rays of glue already applied on the icon. This sizing can be preserved for several weeks in the fridge. Add a little water to find a good consistency before tracing the lines with the brush.
- Stout based sizing:
Put a half glass of stout beer in a container and add a half teaspoon of red ochre to it. Stir well and let it dry several days. The molasses thus obtained constitutes the glue to affix the gold and you only need to wet it a little before use. The addition of red ochre is to make visible the lines traced on the icon. It is possible to accelerate the drying process by heating the beer slowly. This glue can be kept indefinitely.
- Synthetic sizing:
Some iconographers use synthetic water sizing to apply gold assists. The difficulty consists in finding a good dilution to obtain fine and precise rays as sizing with too much water can cause blurring.
|
The preparation of the icon
|
|
|
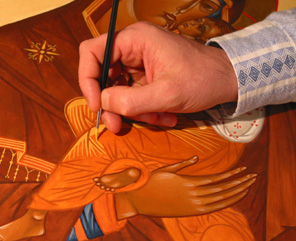 |
After having produced a sketch on the location of the golden lines, prepare a yellow ochre or a white lead color with a little emulsion and trace out the rays of the assist. |
 |
- When the yellow ochre or white lead lines are dry enough, the second operation consists in slightly powdering with talcum the areas around the gold assist. It is absolutely necessary to protect the painting - tempera remains greasy and sticky - because it is very difficult, even impossible to remove the small particles of gold leaf that could settle on it during the application of the Assist. |
The assist
|
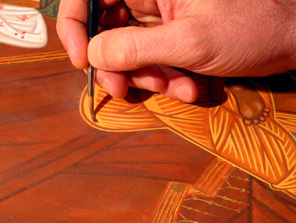 |
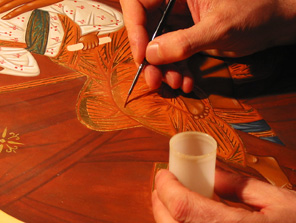
- Apply the sizing, making precise and regular lines and repeating this two or three times.
- Let dry a few minutes.
- If the surface of the assist is large, divide your work into several parts.
- Clean the paintbrush from time to time with water to prevent talc from gathering. |
 |
- Apply the gold leaf pressing slightly with your finger on each sized area.
- If drying has advanced too much using the garlic or the stout based glues, just moisten the lines with your own breath: this will "awake" the glue.
|
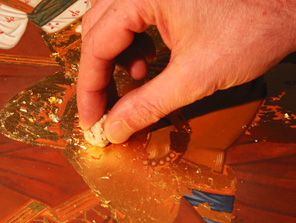 |
- Use a ball made from the soft part of black bread (preferable to the soft part of white bread) to dab the gold leaf and make it stick. Don't press too hard because of the risks of flattening. |
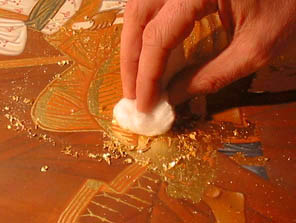 |
- When the gold leaf is very dry (wait about 20 min.) smooth it with some wadding cotton: this operation also has the effect of removing the extra gold as well as the talcum. If it is not sufficiently smooth, use a very soft brush to complete this operation. Smoothing with cotton has to be done very delicately.
- Gold lines have a certain thickness, and once smoothed well, they will shine brilliantly. |
 |
- Protect the golden rays by brushing on a solution of half bleached shellac / half 90% alcohol.
- To remove any trace of talcum at the end, it is recommended that a layer of emulsion with 50% water is brushed on the whole surface of the icon
|
|
|
