|
Preparation of the mortar
|
| The preparation of the mortar is the same for the rough coat layer and the painting coat. The usual proportions are one part of hydrated lime powder for two parts of sand. You have just to choose finer sand for the painting coat according to the format and the desired effect. |
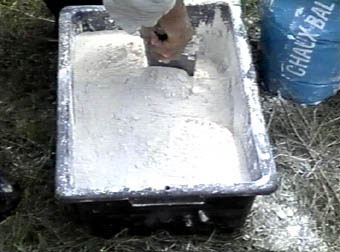 |
- Sand must be dry for the preparation of mortars.
- Mix sand and lime dry as closely as possible using the trowel.
- Lime is caustic and its inhalation can inflame the throat : protect your respiratory tracts by wearing a mask. protect your hands by wearing gloves.
- Add water in small quantities and mix with the trowel until obtaining a consistent paste. |
Experienced wall painters warn of the dangers resulting from a water excess; therefore the mortar must be sparingly mixed with little water. These precautions provide a slow-setting and thus allow for regular work during more time. Moreover, too fluid a mortar, especially when applied on a wall or a rough coat with little absorbancy, will tend to crack and may become porous : water evaporation forms a quick surface crust and leaves vacuums or gaps inside.
Mortar can be stored from 15 to 20 days and even more during winter. .
Before application, mortar should be worked again to maintain its flexibility. Don’t add water, but mix well to obtain a good paste. A mortar that is rough, breakable, or hard to scoop up and flatten, may form cracks.
|
The rough coat layer
|
 |
- Before coating large surfaces, apply dovetail strips that will be used " to draw up " the coat and to give it a constant thickness.
- Generally the rough coat layer has one centimetre depth (3/8''). |
 |
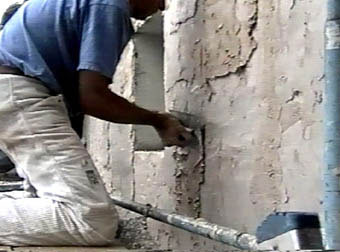
- Generously wet the wall before application, and wait for the penetration of the water.
- Apply the mortar to the wall using the trowel.
- Avoid smoothing with the trowel as it brings water up to the surface, and the mortar cannot adhere to the support. . |
 |
- Wait a moment and draw up the rough coat pressing a metal rule on the pilot strips.
- Remove the surpluses with a shearing gesture.
- Remove the strips and fill the holes with mortar.
- Leave the coat rough so that the painting layer will adhere perfectly. If necessary make it rough with the blade of the trowel.
- Let the rough coat layer dry overnight. . |
|
The painting coat layer
|
|
It is very important that the painter should supervise the preparation of the mortar, even if he does not do the work himself. The mortar for the painting layer is made of one part of lime for two parts of sand. Choose larger sand and add10% of white cement into the mixture for an outside fresco..
|
 |
- Apply the coat early in the morning, so that it will remain wet during the day. Begin painting only when the layer resists the pressure of your finger.
- The painting coat layer generally has 5 mm (3/16+'') thickness.
- Apply the mortar with the trowel or the stucco trowel, pressing strongly without going over mortar that has already been applied. This avoids an increase in surface water.. |
Floating
|
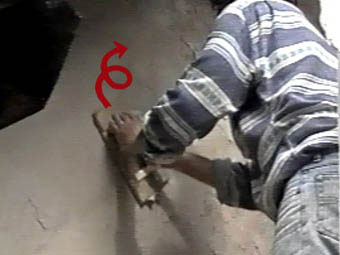 |
- Wait until the layer begins to set - i.e. it adheres to the lower layer (you can check it by small finger pressures : if the coat does stain and leave any trace of water on the surface, you can float.)
- Flatten the painting coat surface using a square float in ascending circular movements. Do not float in the same area for a long time because the water brought to the surface may take off the layer..
|
 |
- Fill the small holes with a narrow trowel.
- Float again until all surface is plane and equal.. |
Smoothing
|
 |
- The coat must be smoothed before the painting stages.
- This smoothing will be done again after the first color application in order to delay the carbonation.
- Pass the cat's tongue trowel delicately on the whole painting coat surface without insisting.- The trowel should not be wet while smoothing.. |
|
|